Common PC Building Mistakes to Avoid
Every experienced builder has a story about the time something went wrong on a build that should’ve been simple. Mine involves forty minutes of confused troubleshooting over a system that wouldn’t boot, before realizing the CPU cooler still had its protective plastic film sitting between the base plate and the chip. Temperatures were fine, technically — the system just refused to believe it was cool enough to run. That’s the thing about building your own PC: most of the mistakes aren’t complicated. They’re small, easy to overlook, and completely avoidable once you know to look for them.
Here’s the list I wish someone had handed me before my first build.
Buying a GPU with 8GB of VRAM and expecting it to age well
This one keeps showing up in 2026 builder guides for a reason. Eight gigs of VRAM was a reasonable mid-range spec a few years back. It isn’t anymore. Modern titles lean on high-resolution textures, ray tracing, and sprawling open worlds hard enough that even 1080p gaming can bump into stuttering and texture pop-in on an 8GB card, and it only gets worse as you push resolution up. If you’re spending real money on a build meant to last, treat 12GB as your practical floor and 16GB as the number that actually buys you peace of mind for the next few years.
Assuming parts will “just fit together”
I get why people assume this — modern PC parts really do look plug-and-play from a distance. They aren’t, quite. CPU and motherboard socket mismatches are still one of the most common first-time mistakes out there: someone picks an Intel chip and grabs an AMD board to go with it, or gets the socket right but the chipset wrong. RAM trips people up too, since compatibility isn’t just “DDR5 or DDR4” — it’s whether your specific motherboard’s QVL, its qualified vendor list, has actually validated that kit at its rated speed. Skip that check and you might end up with RAM that boots fine but quietly runs well below the speed you paid for. Before you buy a single part, run the full list through a compatibility tool like PCPartPicker, and if anything looks uncertain, ask in a hardware forum before you click purchase, not after.
Cheaping out on the power supply
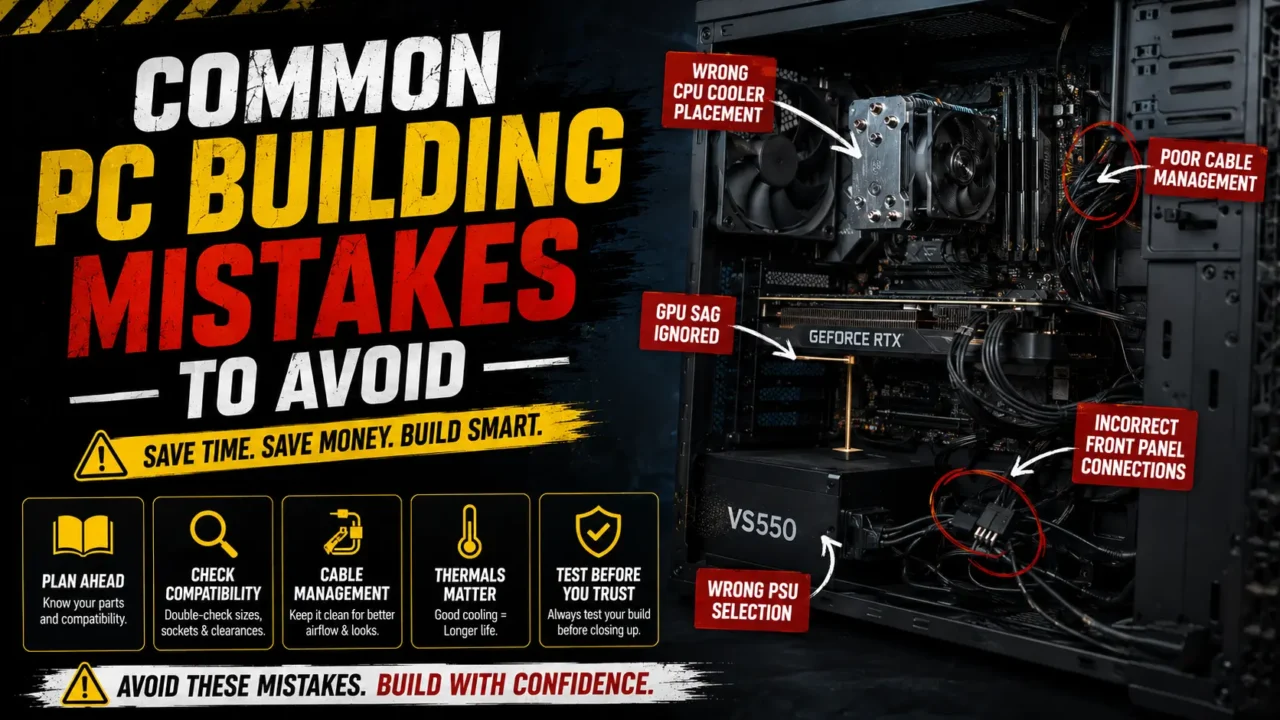
I’ll say this plainly because it deserves to be said plainly: the PSU is not the part to save money on. It’s not just delivering power, it’s protecting every other component from that power going wrong. A poor-quality or underpowered unit can cause random reboots, mysterious blue screens, corrupted files, and in the worst cases, it can take other components down with it when it fails. The fix isn’t complicated — run your build through a wattage calculator, then buy roughly 20 to 30 percent above your calculated draw from a properly 80 Plus–certified unit. It’s the least exciting line item on your build sheet and the one most worth getting right.
Skipping or misplacing the motherboard standoffs
This is a mistake that’s easy to make once and impossible to make twice, because the first time usually comes with a very expensive lesson attached. Standoffs create the physical gap between your motherboard and the case, keeping the board’s underside from touching bare metal and shorting out the instant you hit the power button. Count the standoff holes on your specific board, install exactly that many in the matching positions, and resist the urge to just fill every hole in the case “to be safe” — extra standoffs in the wrong spots cause the exact same short you were trying to avoid.
Forgetting the I/O shield, or the backplate orientation
Small part, big headache. The rear I/O shield has to go in before the motherboard, and there’s no elegant fix once you’ve already mounted the board and remembered you skipped it — you’re pulling everything back out. If your board didn’t come with a pre-installed shield, put “install I/O shield” at the literal top of your build checklist, before you touch anything else. Cooler backplates cause a similar problem in a different form: some sockets, AM5 in particular, expect you to keep the factory-installed backplate and only swap the front mounting bracket, and installing that bracket backward is reportedly one of the single most common cooler-related mistakes beginners make. Read the specific instructions for your specific socket. Don’t assume last generation’s process still applies.
Not connecting your fans and AIO pump to the motherboard
It sounds almost too basic to mention, and that’s exactly why it happens constantly. Builders get so focused on the big, satisfying steps — seating the CPU, dropping in the GPU — that the small fan and pump headers get missed entirely. The build powers on, looks completely normal, and is quietly cooking itself because nothing’s actually spinning. Before you close the case up or power on for the first time, physically trace every fan and AIO cable back to its header and confirm it’s seated. It takes two minutes and it’s the difference between a normal first boot and a thermal shutdown twenty minutes later.
Forgetting to remove protective film or plastic
Back to my own story from the top, because it’s common enough to be worth repeating: coolers, thermal plates, even some GPU brackets ship with a thin protective film that’s genuinely easy to miss, especially on a clear or reflective surface under case lighting. Take thirty seconds before you mount any cooler to run a finger across the contact surface and confirm it’s actually bare metal, not film that looks like bare metal.
Letting cable management become an afterthought
Nobody’s first build has perfect cable routing, and that’s fine. But cables aren’t purely cosmetic — bundled, poorly routed cables block airflow, and blocked airflow means hotter components across the board, not just wherever the cables happen to be sitting. You don’t need a magazine-cover build. You do need cables routed behind the motherboard tray where your case allows it, and nothing draped directly across your intake fans.
Blowing the budget on the wrong component
This mistake goes in both directions, and I’ve seen builders fall into either version. Some sink most of the budget into a flagship CPU on the assumption that it’s the part that matters most, then pair it with a mediocre GPU that ends up bottlenecking the whole system in actual games. Others do the reverse, buying the biggest GPU they can afford and pairing it with a budget CPU that can’t feed it enough frames to make the expensive graphics card worth the money. Balance matters more than any single component’s spec sheet number, and a build that’s proportionate across CPU, GPU, RAM, and storage will almost always outperform one that’s lopsided toward a single flashy part.
Not checking physical clearance before you buy
Case dimensions matter more than people expect until it’s their build sitting half-assembled with a graphics card that physically won’t fit. Check your case’s maximum supported GPU length and CPU cooler height against the specific parts you’re buying, not just a general “should be fine” assumption. It’s a five-minute check against the manufacturer’s spec sheet, and it’s a lot cheaper than discovering the problem with a card already in your hands.
The actual lesson underneath all of this
Nearly every mistake on this list shares the same root cause: moving fast through a step that actually deserved five extra minutes. None of these are hard to avoid once you know they exist — they just require the patience to double-check before you commit, rather than assuming everything will simply work because the parts look like they should fit together. Keep your motherboard manual open to the diagram page while you build, verify compatibility before you buy anything, and take your time on the small stuff. The best builds aren’t the ones assembled fastest. They’re the ones that just work the first time you hit the power button.